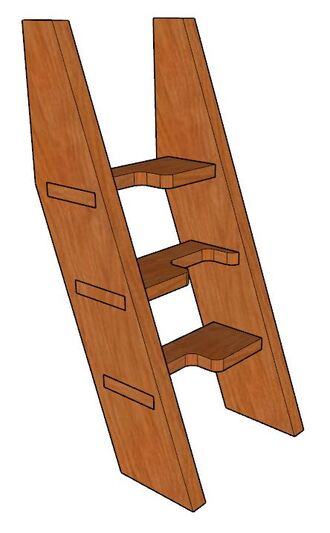
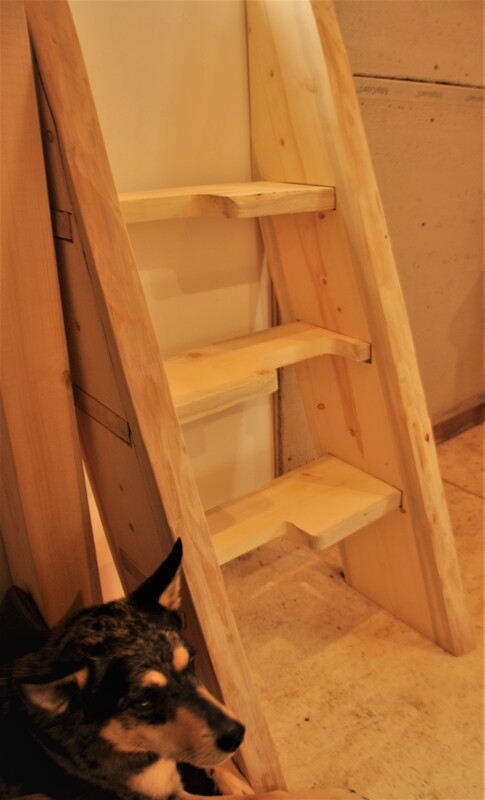
A common issue with small home designs is access to the loft space. Where there is no room for a full set of lavish stairs, but something more stable than a standard ladder is needed. Enter the ship ladder. It has deep treads to support the whole foot but also a steep incline so as not to take up much floor space. Sounds perfect – let’s make one! In our particular situation, we are going to use two smaller ship ladders and a landing of sorts at the halfway point between them. We will use the space under the landing for storage and maybe the occasional dog bed. Click the button below to download the ladder plans.  The first step is to go dig your materials out of the snowbank and brush the ice off as best you can. I will be using some 2” thick spruce slabs I milled a few weeks ago. Get your saw horses out. If they are already out because they are encased in 18” of snow and ice, then that’s great; just leave them there. 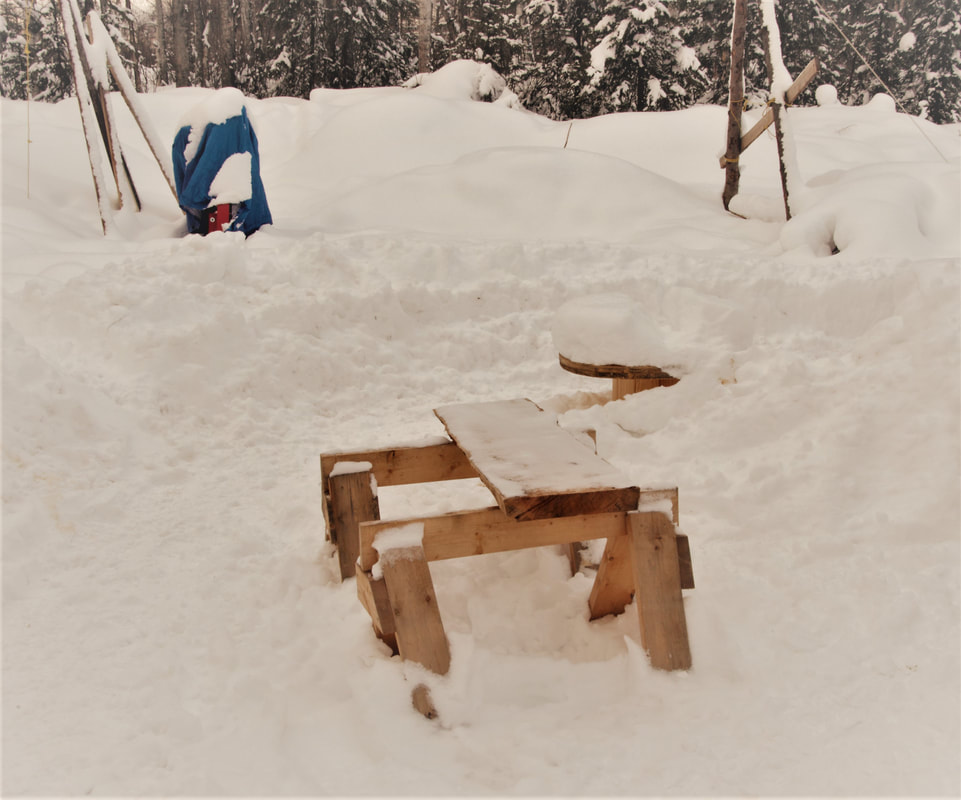 Clamp the slab to the sawhorse and shave off the bark with a draw knife. Then, bring it all into your living room to dry out and acclimate near the wood stove for a few days. This will most certainly cause the material to crack and bend. It would be nice if we could kiln dry and plane them. We can’t do that, but we can let it warm up for a while then hit it with a belt sander. So that’s what we’ll do. 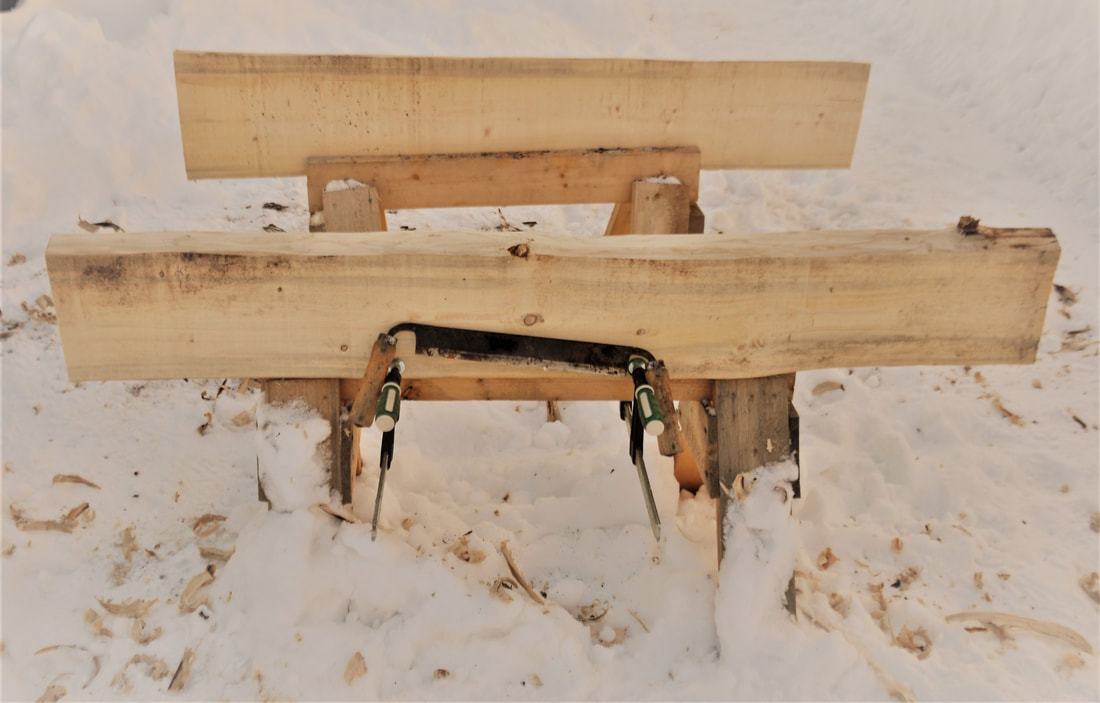 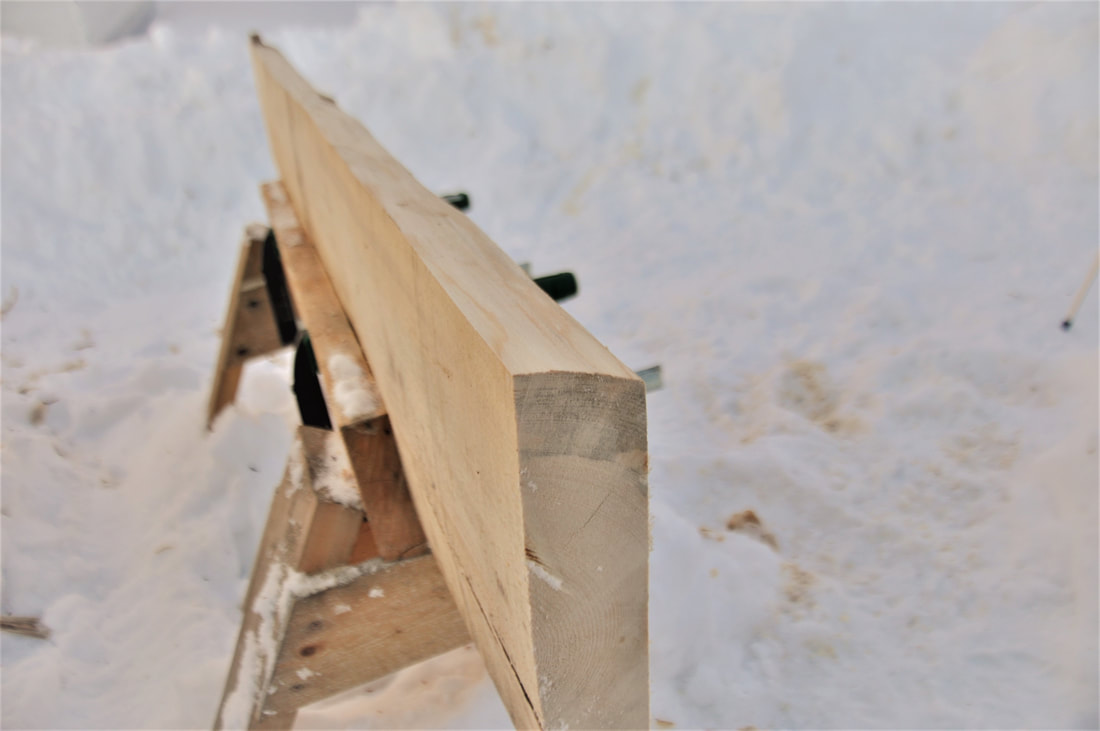 After a few days in the warm dry air the surface of the wood will be nice and dry and you can begin to layout your cuts. It is nice to do the layout in a warm and comfortable area. If you cant bring your sawhorses inside because they are still frozen to the ground outside, then just do the layout on the floor. Pour yourself a fresh cup of coftea and start marking out the measurements on the stringers. Go slow and double check everything. This is the most important part, so take your time! I cover the process I used for laying out the cuts in more detail in another post HERE. 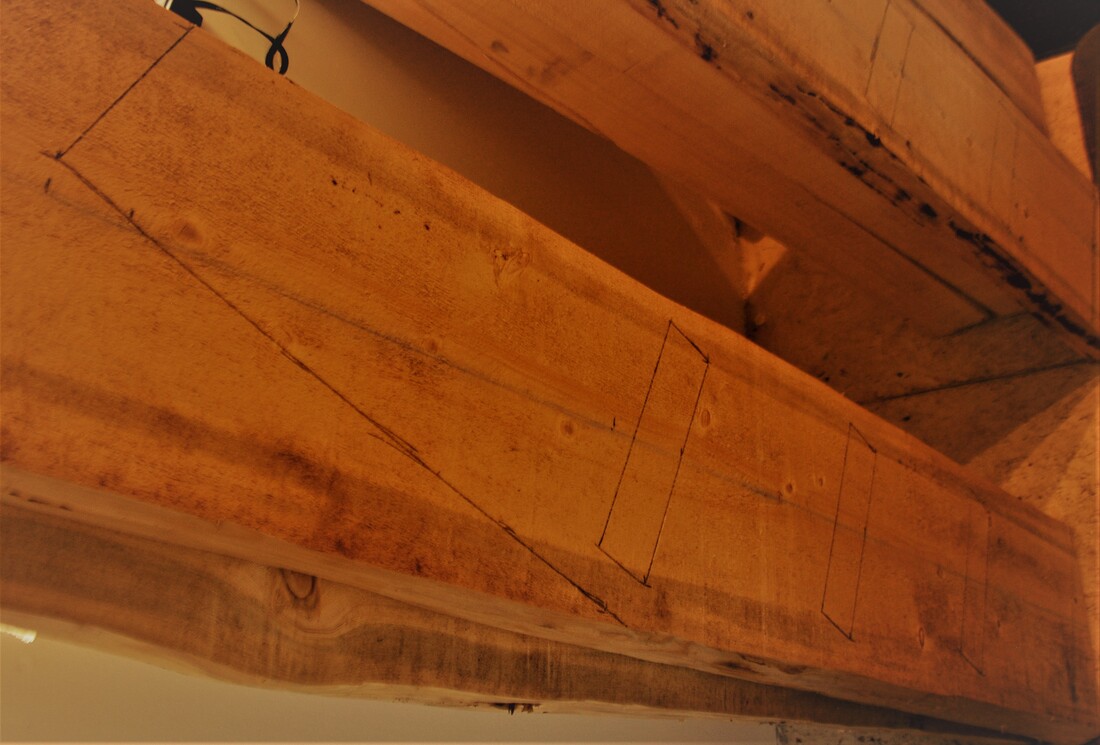 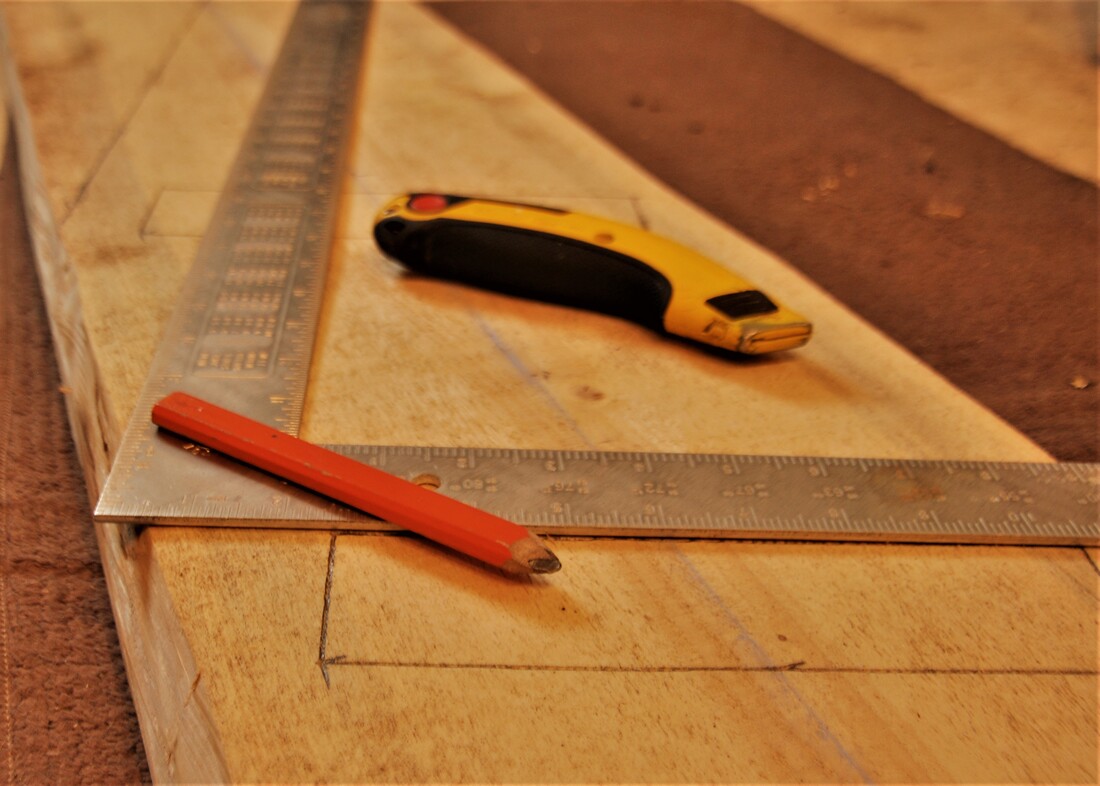 I had originally designed the treads to be 2” thick, X 8” deep, but another foot of snow over the weekend prevented me from pulling any logs or using the mill to finish making the materials for this project, so I had to dig through the lumber stack to find something suitable. I went with some dimensional 1 ½ X 7 ½ spruce boards I had made earlier in the fall – close enough! Of course, I had already done the layout on the stringer slabs for the 2”X8” treads. Oh well, this is one mistake an 80 grit belt can erase.  After laying out all of the cut lines, bring the slabs out to the saw horses. Clamp them down and get ready to make some sawdust. I started by cutting out the slots for the treads. To do this, I first bored a 1” diameter hole at each end of each slot using an auger bit in the drill. From there, I used the circular saw to make a plunge cut along both long edges of each slot. I then trimmed out the ends using the reciprocating jigsaw. This 1 ½” thick stock was a little too thick for my jigsaw so the walls of the slot were slightly tapered due to the blade bending. I worked this out using a 1 ½” wide framing chisel to shape them back. 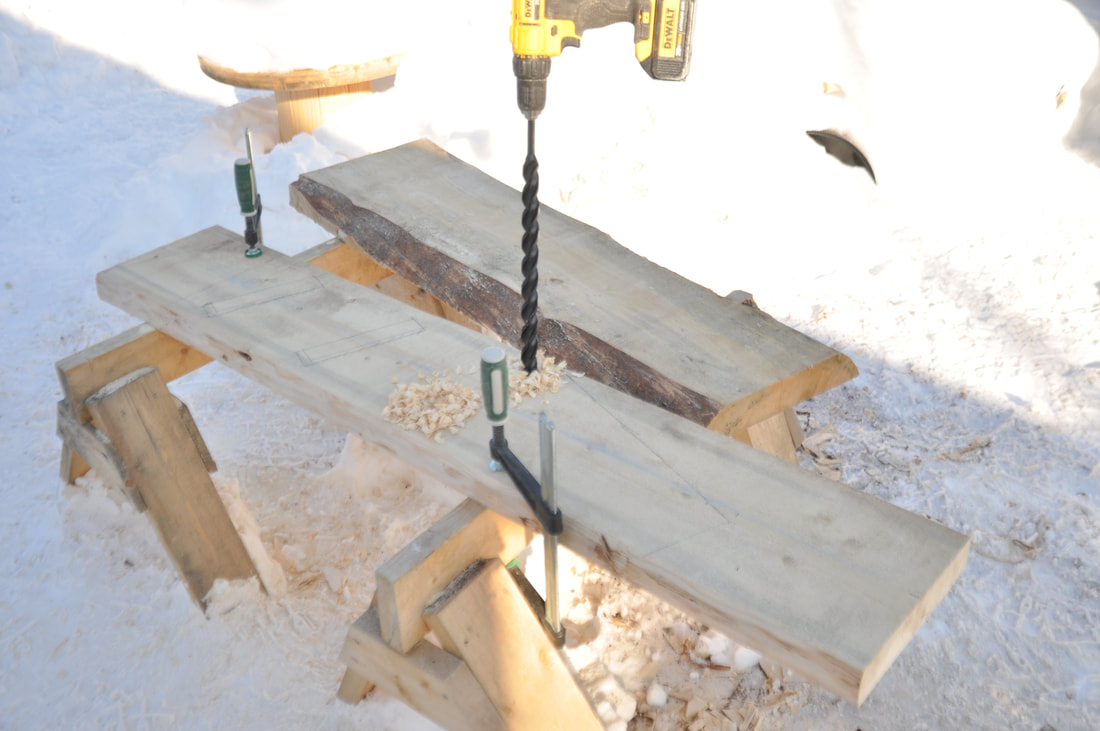 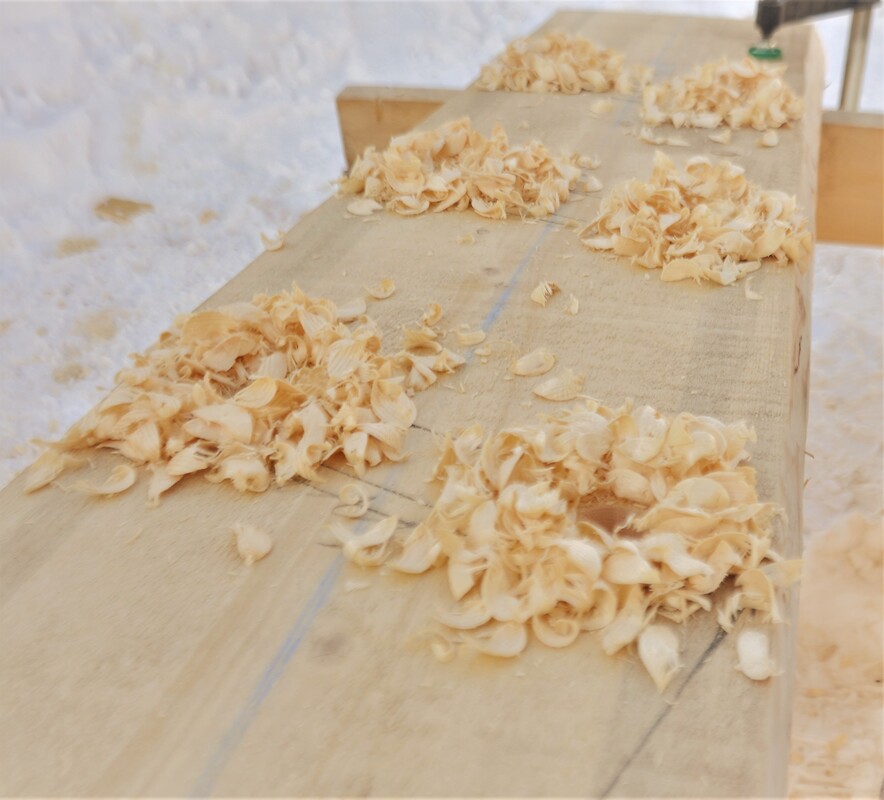  Once the slots were cut and a tread was test fit in each, I cut the ends of the stringers using the circular saw. After the cutting was done, I used the belt sander with an 80 grit belt to smooth up the surfaces; removing the sawmill marks and the dirt stains which had accumulated. 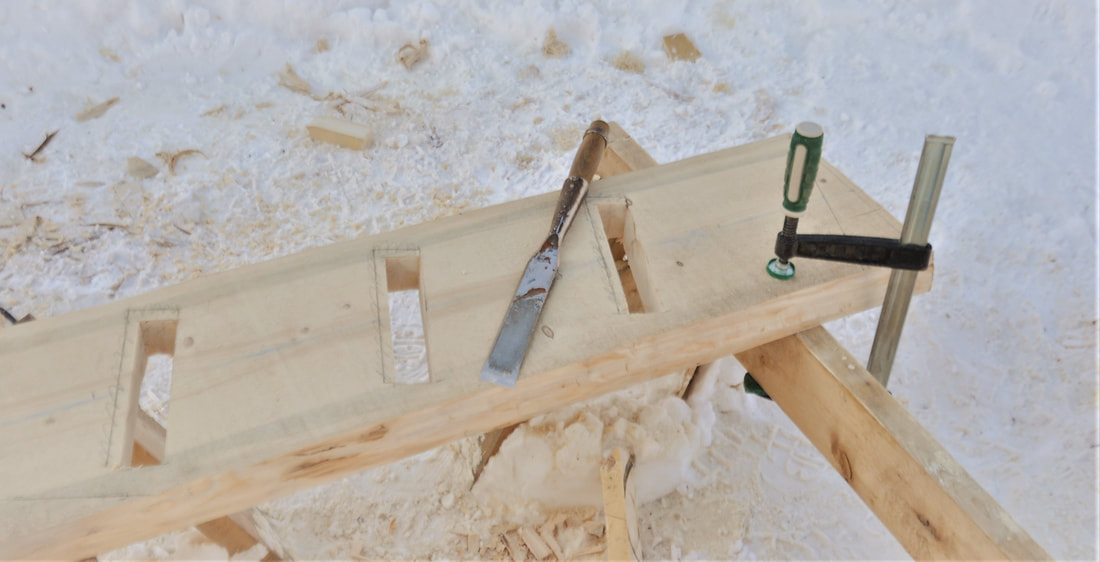 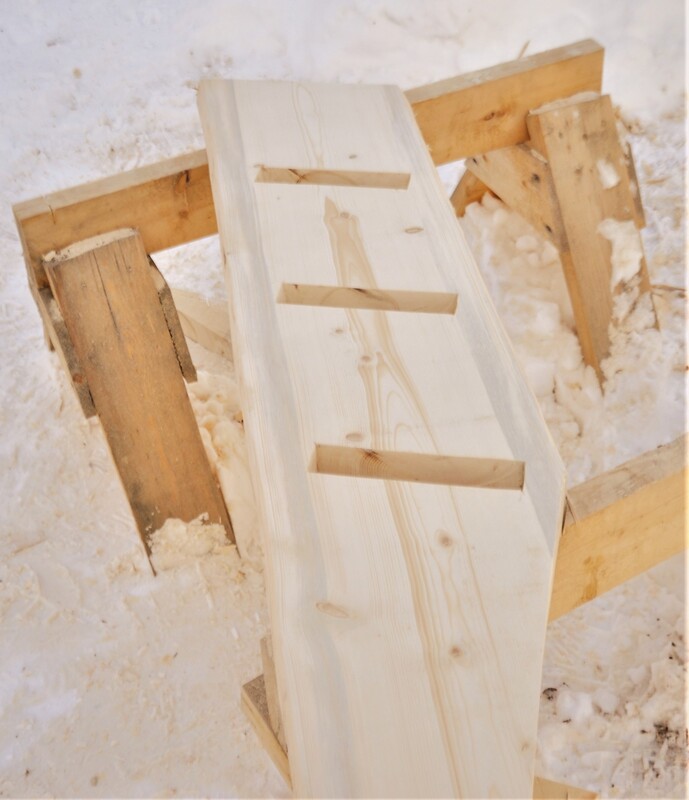 After the stringers were finished, I quickly marked out the three treads. Each tread was 20 ½” long and had a 3”X7” notch cut out to give space for a foot to pass by, making the ladder feel slightly more like stairs. I used the cap off a small can of WD-40 to trace the radius of the corers then used the jigsaw to make the cuts. Next, I used the hand planer to chamfer the edges and then the belt sander to take off the future foot slivers. 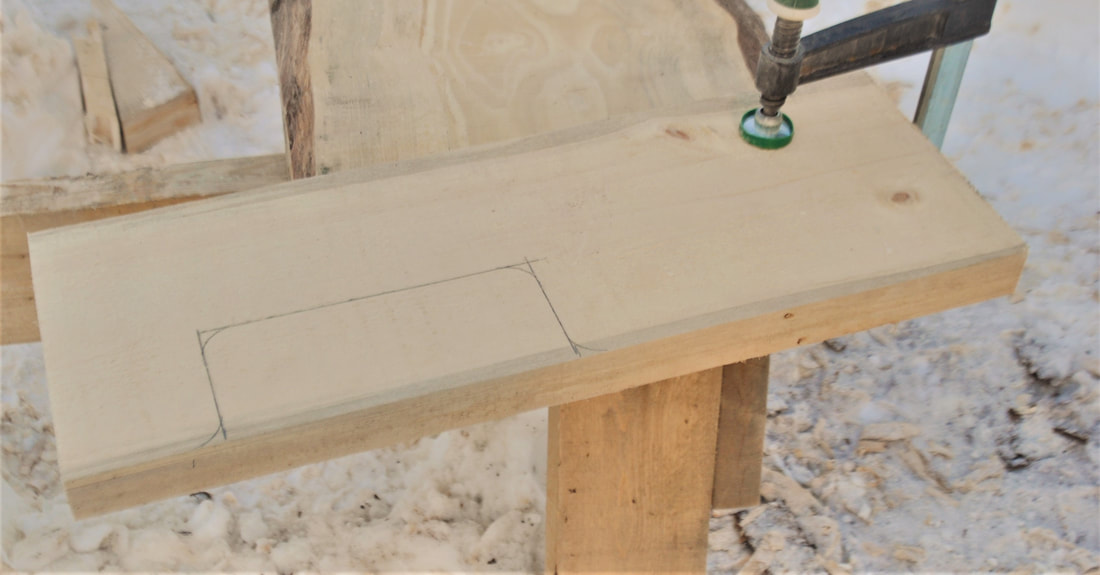 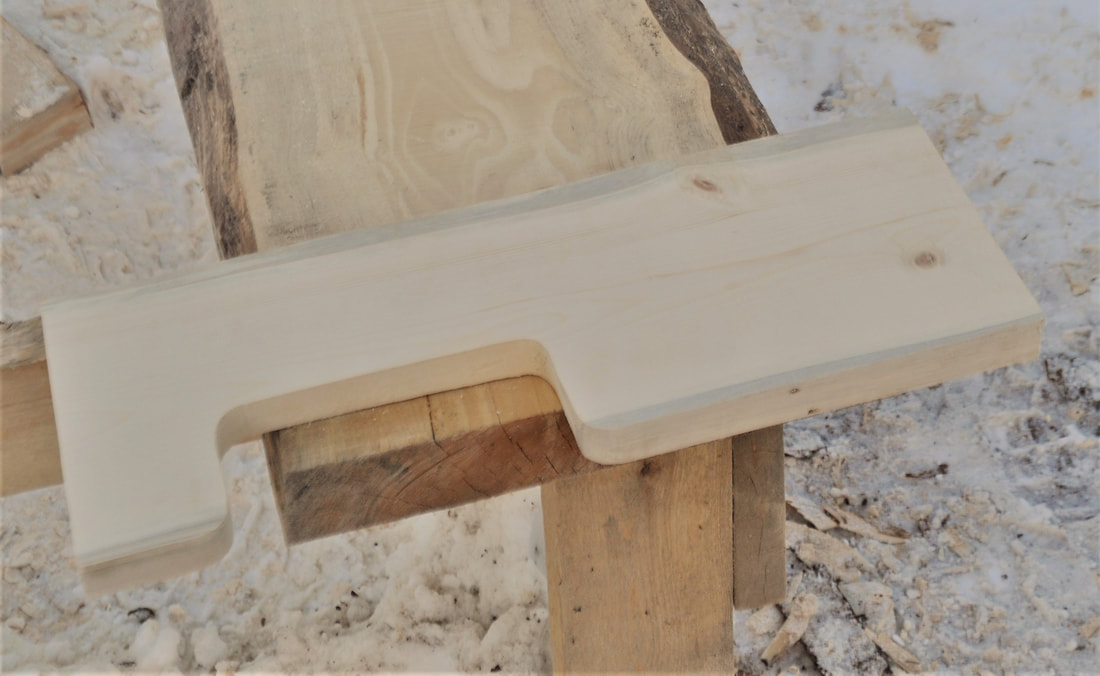 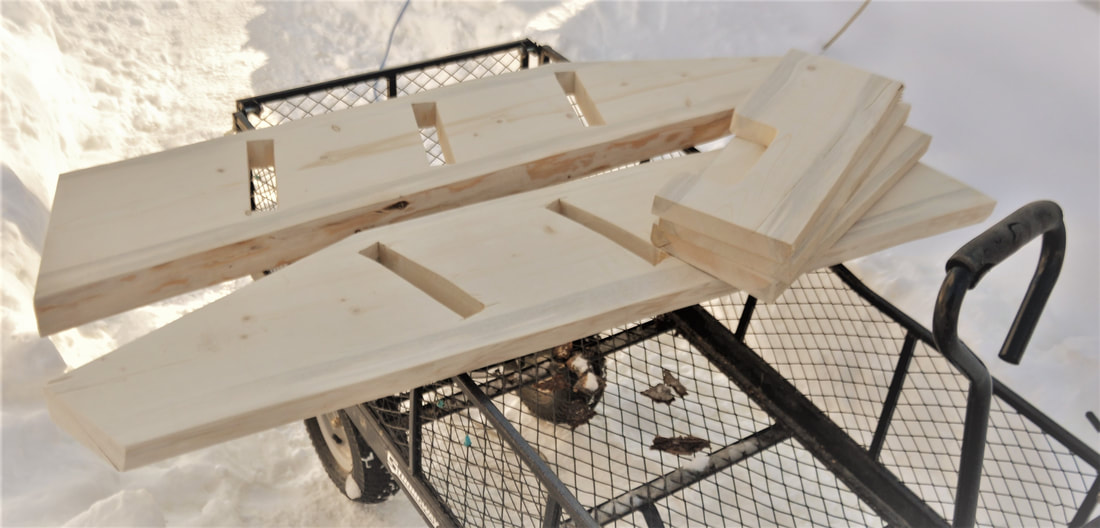 To assemble the ladder, I simply laid one stringer on the floor and set the three treads in the slots – making sure to alternate the notches in the treads. I then drilled two angled pilot holes on the bottom side of each tread, just inside where it meets the stringer. 3 ½” coated deck screws were then used to fasten each end of each tread to the stringer. This fastener might be a bit long for this application, but they are what I had. 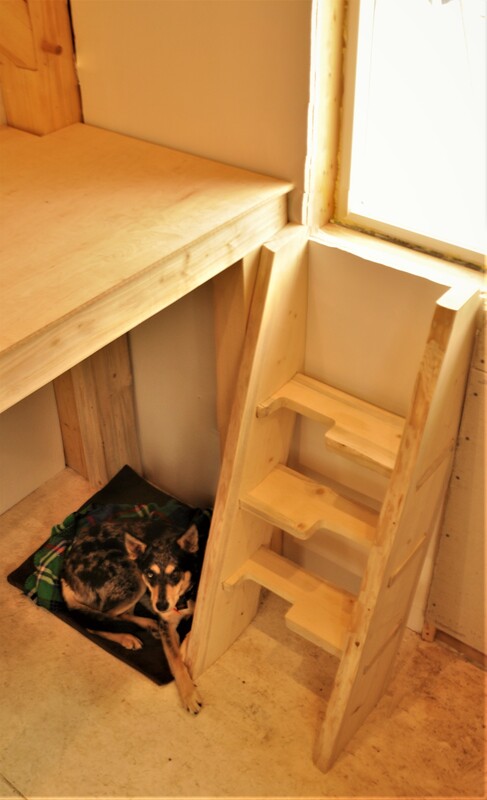 A couple of quick screws through the top and bottom anchor the ladder into place. Countersink the screws and fill the holes with putty to be extra fancy. I am going to wait on applying any stain or preservative to the wood until it gets warmer outside and I won’t have to sit next to the evaporating solvents as it dries. The landing is also somewhat temporary at this point. Since my sawmill is currently inaccessible I used some of the first birch 2X4s I had ever milled. Needless to say they are not quite square and I plan to eventually cut some proper ones to replace them.
As with other projects around this homestead, getting something usable in place in priority #1. Beauty can be improved later on when there’s time. Thankfully, “Rustic” is so in right now and pretty much anything made from live edge slabs fits that definition.
2 Comments
9/8/2023 01:09:31 am
Thanks for making a blog about ship ladder. I really love how well written this article is really helpful. 9/8/2023 03:33:35 am
Thank you for sharing your ideas about ship ladder. Your balanced approach to the topic is refreshing, and it encourages healthy discussions. Leave a Reply. |